
A great Dragon Adventures lair theme does more than look good on a screenshot. The walls, floors, and structural materials you choose shape how the space feels, how dragons flow between rooms, and how smoothly the lair breeding area plugs into the rest of your build. This guide walks through how to pick a coherent theme, where to source every tile and panel, and how to lay out a theme that supports feeding, growth, and breeding without becoming a maze of mismatched pieces. Whether you just unlocked your plot or are redoing a level-100 build, treat your theme as infrastructure, not decoration.
Reading the Lair Theme System Before You Build
The Dragon Adventures lair runs on a layered system: a structural shell built from lair building materials, a skin of lair walls and lair floors layered on top, and dedicated rooms that house specific functions. Sonar Studios lets you swap skins freely, so a theme is more about palette and atmosphere than about locking in a single permanent look. Understanding the layer order saves materials and rework.
How the Build Layers Stack
Each tile in the lair belongs to one of three layers, and the layer below has to be in place before the layer above renders. Skipping a layer is the most common reason a new player's theme looks patchy even after they buy expensive skins.
| Layer | What it controls | Examples | Swap cost |
|---|---|---|---|
| Frame | Footprint, room count, wall height | Basic Wood, Reinforced Stone, Crystal Frame | High — requires demolition |
| Surface | Lair walls and lair floors visible to players | Plaster, Brick, Marble, Mossy Stone, Crystal Tile | Medium — pay per tile |
| Trim | Doorways, accents, room dividers, themed borders | Metal Trim, Vine Accent, Rune Inlay | Low — consumable cosmetics |
Most players obsess over the surface layer because that is what shows up in screenshots, but the frame layer decides ceiling height and room volume. Pick a frame that matches the dragon adventures lair theme vibe you want before you sink resources into surface skins.
Theme Categories the Community Uses
Players on the Dragon Adventures subreddit have settled on a handful of recurring theme families. None of them are "official," but they map cleanly onto the available material pool and they share visual language with the biomes you farm in.
-
Forest Hollow — mossy stone, vine trim, plank floors, warm lanterns.
-
Volcanic Forge — dark brick, ember trim, obsidian tiles, iron framing.
-
Crystal Spire — crystal frame, glass walls, polished tile, rune inlays.
-
Tundra Keep — pale stone, frosted tile, fur rugs, ice-blue accent walls.
-
Sun Temple — sandstone, gold trim, sun-bleached floors, painted plaster.
Pick a single theme family before you start buying materials for your lair walls and floors. Mixing forest moss with volcanic obsidian is the fastest way to make a level-60 lair look like a level-10 starter plot, because the mossy plank/wood palette clashes hard with ember trim and iron framing, and your breeding area will inherit that same visual incoherence. Lock your crystal frame, glass, pale stone, or sandstone choice first, then match every subsequent purchase (rune inlays, fur rugs, gold trim) to that family.
Walls: Picking the Right Surface for Each Room
Lair walls are the single biggest visual driver in any lair, because they cover more area than floors, doors, or trim combined. Most themes look coherent as long as the walls stay in one family and one tone per room, with the accent walls reserved for a single feature area.
Wall Tier Comparison
The table below compares the most common wall surfaces, how they read on screen, and where each one fits in a 2026 build. Prices are reported by players and fluctuate with events, so treat them as a relative ranking, not a fixed quote.
| Wall surface | Visual tone | Best room type | Approx. material cost | Durability |
|---|---|---|---|---|
| Plaster | Clean, neutral, easy to recolor | Starter rooms, generic stalls | Low | Medium |
| Brick | Warm, rustic | Forest Hollow, Volcanic Forge | Medium | High |
| Mossy Stone | Aged, overgrown | Forest Hollow, swamp biomes | Medium | High |
| Marble | Bright, formal | Crystal Spire, Sun Temple | High | Very high |
| Crystal Tile | Translucent, glowing | Crystal Spire, magic-themed rooms | High | High |
| Sandstone | Warm tan, sun-bleached | Sun Temple, desert builds | Medium | High |
| Frosted Panel | Pale blue, cold | Tundra Keep, ice biomes | High | Medium |
| Painted Plaster | Custom colors, preset codes | Themed accent rooms | Low–medium | Medium |
The trick with dragon adventures lair walls is to anchor one or two statement walls in a feature room and run a cheaper neutral on the rest. A single marble accent wall behind the breeding altar reads better than four walls of marble with no contrast.
Wall Placement Strategy by Room Type
Different rooms benefit from different wall choices, and the wrong wall can make a functional space feel cramped even when it is large enough. The deciding factor is rarely square footage; it is how the wall texture interacts with room lighting, floor reflectivity, and the size of the on-screen dragon model. For example, a 6x6 stall lined in polished marble visually shrinks around a juvenile dragon because the high-contrast veining draws the eye to every empty corner, while the same footprint in flat plaster reads as a clean, open paddock. Wall color temperature also shifts how egg incubation icons render in the breeding room, which is why darker brick or sandstone is preferred there. Always preview a swatch before committing.
-
Breeding room — use a darker wall with one accent. The lair breeding area reads better against brick, mossy stone, or sandstone than against bright marble, which can wash out the egg icons.
-
Stalls and feeding bays — keep walls neutral and durable. Plaster or painted plaster absorbs the most abuse from dragon movement and makes feed icons easy to spot.
-
Nursery and growth rooms — softer tones like mossy stone or frosted panel reduce visual noise while eggs are incubating.
-
Display room — this is where to push the theme hardest. Marble, crystal tile, or themed painted plaster gives your showcase dragons a proper backdrop.
-
Storage and utility — cheapest tier is fine here. Most players use plain plaster and reserve resources for visible rooms.
If you want a deeper look at how the lair connects to breeding mechanics, the lair building primer breaks down the room-by-room build order that pairs with this theme work, including which breeding area wall finishes (brick, mossy stone, sandstone) sit at the correct camera height so the egg incubation icons stay readable when two adult dragons are mid-animation on the nest pad.
Floors: Building a Coherent Ground Layer
Lair floors are the second most visible surface, and they take the brunt of foot traffic from both dragons and players. Floors matter more for function than walls because they affect how fast dragons path between feeding and growth stations, and how easy stalls are to clean visually.
Floor Tier Comparison
Floors tend to be cheaper per tile than walls because they cover open space, but the total spend adds up fast in a large lair. The table below ranks the most common floor surfaces by look, durability, and how well they pair with each wall family.
| Floor surface | Visual tone | Pairs well with | Foot-traffic durability | Cost tier |
|---|---|---|---|---|
| Plank | Warm wood | Brick, plaster, mossy stone | Medium | Low |
| Cobblestone | Old-world, rustic | Brick, mossy stone, sandstone | High | Low |
| Polished Tile | Bright, formal | Marble, painted plaster | High | Medium |
| Crystal Tile | Glowing, premium | Crystal walls, rune trim | Medium | High |
| Sandstone Slab | Warm tan | Sandstone, brick, plaster | High | Medium |
| Frosted Tile | Cool blue | Frosted panel, marble | Medium | High |
| Mossy Flagstone | Green, overgrown | Mossy stone, plank | Medium | Medium |
| Volcanic Rock | Dark, ember-edged | Volcanic brick, obsidian | Very high | High |
A floor that contrasts with the wall is usually a mistake in a small room but works in a large display hall. A polished tile floor against mossy stone walls is the classic "spa look" that community builders favor for nurseries and growth rooms.
Floor Zoning for Function
The most common floor mistake is laying one material across the entire footprint, which flattens the lair visually and forces players to use furniture alone to signal purpose. Zoning floors by function — feeding, breeding, growth, display, and utility — makes the lair easier to navigate and gives each room its own identity without spending extra on walls or partitions, since the texture shift underfoot does the visual division. A simple test is to walk the lair in first-person: if you cannot tell which zone you are in by floor alone, the zoning is too weak.
-
Feeding zone — durable cobblestone or volcanic rock. Easy to clean, hides stains, and stands up to spills.
-
Breeding zone — a slightly raised sandstone or polished tile platform marks the lair breeding area without needing a rug. Pair it with a darker wall so egg icons pop.
-
Growth and nursery zone — mossy flagstone or plank keeps the visual temperature low, which is what most players prefer for hatchling rooms.
-
Display zone — crystal tile or polished tile is the strongest backdrop for screenshots. Save these for the showcase rooms.
-
Utility and storage — plain plank or cobblestone. Do not overspend here.
If you are still unlocking the broader lair and need to revisit the prerequisites before you start zoning floors, the lair unlock walkthrough covers the level-by-level requirements and material budgets.
Sourcing Building Materials Without Burning Resources
Dragon adventures how to get building materials is one of the most common questions on the official Discord, because the answer changes as the lair levels up. Early game leans heavily on biome farming, while late game mixes biome drops with chest rewards, event tokens, and the trading economy.
Primary Material Sources
| Source | What it drops | Best for | Cadence |
|---|---|---|---|
| Biome farming (Forest, Jungle, Ocean) | Wood, stone, mossy flagstone, basic metals | Frame and floor materials | Daily |
| Biome farming (Tundra, Prehistoric, Ancient) | Rare stone, frosted panel, rune inlays | Accent walls and trim | Weekly |
| Chest routes (biome and world chests) | Mixed surface skins, occasional crystal tile | Wall and floor skins | Resets on rotation |
| Event rewards (Solstice, Halloween, Birthday) | Limited skins, themed trim | Showcase builds | Per event |
| Trading | Specific surfaces other players have stockpiled | Filling gaps in a theme | Anytime |
| Codes | Preset potions and small material bundles | Side upgrades, accent paint | Monthly |
According to community data reported by players, a mid-game player can expect to cover most of a 4-room lair in two to three weeks of mixed biome farming and chest routes. Late-game builders with active trading pipelines can finish a full theme in under a week if they know which surfaces to source and which to buy.
Material Budget Cheat Sheet
This is a rough per-room budget that community builders have shared for a coherent single-family theme, weighted toward walls (roughly 40–50% of material cost) and floors (around 30–35%), with trim and accents making up the remainder. Real costs will shift with events, seasonal drops, and how aggressively you grind the breeding area for material-generating offspring, but the relative weight across walls, floors, and trim stays consistent whether you are building a budget starter den or pushing toward an endgame showcase lair.
| Build stage | Walls | Floors | Trim | Notes |
|---|---|---|---|---|
| Starter (level 10–25) | Plaster + 1 accent | Plank or cobblestone | None | Focus on footprint, not finish |
| Mid (level 25–60) | Brick or sandstone | Polished tile or sandstone | Metal trim | First "real" theme |
| Late (level 60–100) | Marble, crystal, or frosted | Crystal or themed tile | Rune inlay, event trim | Showcase build |
| Endgame (level 100+) | Mixed premium | Mixed premium | Event trim rotations | Seasonal refresh |
Players who want a sharper breakdown of the level gates and material counts that line up with this budget should read the lair upgrade priority checklist alongside this guide — that companion page walks through each level band (10–25 starter rooms, 25–60 mid-game builds, 60–100 late-game transitions, and 100+ endgame showcases) with exact plaster, brick, marble, and rune inlay counts, so you can match the wall/floor/trim ratios above to a concrete farming plan from your breeding area rather than guessing at material targets.
Laying Out the Breeding Area Inside a Themed Lair
A coherent theme can fall apart the moment the lair breeding area is dropped into the middle of it without a visual anchor. The breeding area is a functional block with its own footprint, its own egg icons, and its own ambient effects, so it needs a room that frames it instead of fighting it.
Room Shape and Footprint
The breeding area is wider than a single stall, so plan a rectangular room with at least one clear long wall. Community builders consistently recommend a 2:1 or 3:1 room ratio because it leaves space for a viewing gallery on the long side.
| Room size | Use case | Theme fit |
|---|---|---|
| Small (1 breeding slot) | Beginner breeding | Works inside a stall zone with a darker wall accent |
| Medium (2–3 breeding slots) | Mid-game breeding | Dedicated breeding room, single-family theme |
| Large (4+ breeding slots) | Endgame breeding pipeline | Themed hall with viewing platform, accent walls |
Wiring the Breeding Area Into the Theme
The most common theme failure is treating breeding as a utility room. The dragon adventures lair breeding workflow benefits from being adjacent to a nursery, and the visual handoff between rooms is what makes a theme feel intentional. When builders skip the connection, the breeding platform ends up reading as a standalone stone pad floating next to a hatchery, and the lair loses the cave-to-cradle narrative that ties the two systems together. Linking them with a shared material run — say, continuing the same cracked obsidian tile from incubation into the feeding nook — turns two separate rooms into one continuous wing. Players who keep the breeding station visually isolated almost always end up restyling it later, because a detached hatchery reads like an afterthought rather than part of the same dragon adventures lair theme.
-
Place the breeding area on a polished tile or sandstone platform to separate it visually from cobblestone feeding zones.
-
Use one accent wall behind the breeding platform — a darker brick or mossy stone reads better than bright marble because the egg icons stay legible.
-
Run a continuous floor from the breeding room into the nursery so the two zones feel like one wing of the lair.
-
Add one piece of themed trim above the doorway between breeding and nursery. A vine accent or rune inlay is enough to mark the transition without breaking the palette.
-
Keep the lighting consistent. Mismatched ambient lighting is what makes a themed lair look like a mashup of two builds.
For builders who want a side-by-side look at how theme choices interact with breeding success rates, the gender inheritance and breeding traits explainer is the most useful companion read because it shows where the visual pipeline meets the breeding pipeline.
Avoiding the Most Common Theme Mistakes
A theme can look great in the material shop preview but still fall apart the moment you lay it down across your dragon adventures lair walls and floors. Most of the time the failure traces back to one of five recurring mistakes — mismatched material scales between the breeding area and the main hall, ignoring how lighting shifts the color palette of stone versus wood, over-cluttering the lair building materials palette with competing accent textures, skipping a dry-run layout in a single quadrant, or building the lair breeding area before committing to a central motif — and each one becomes obvious once you walk through your own lair with a critical eye.
The Five-Theme Checklist
| Mistake | What it looks like | Quick fix |
|---|---|---|
| Mismatched families | Volcanic walls with crystal floors | Re-floor the room in sandstone or volcanic rock |
| Too many accent walls | Three feature walls in one room | Reserve one accent wall per room, neutral elsewhere |
| Flat lighting | All stalls look identical | Add one trim piece per room as a visual landmark |
| Crowded breeding room | Breeding area jammed against stalls | Shift the breeding area to a dedicated wing |
| Unfinished edges | Visible frame layer between rooms | Wrap frames with a continuous surface skin |
Sequencing the Build
Order matters more than material choice because each layer constrains the next: framing sets the footprint that floor tiles and wall skins must respect, and accent walls only look intentional when trim and breeding blocks are already plotted. The community consensus, drawn from Discord builds and Reddit screenshots, is to sequence frame, floor, walls, trim, functional blocks, and display in that exact order so every later skin has a structural anchor to snap onto.
-
Frame first — footprint, ceiling height, and room dividers before any skin.
-
Floor second — run a continuous floor across the room before you start on walls.
-
Walls third — neutral base wall, then one accent wall per room.
-
Trim fourth — doorways, dividers, themed borders. Trim is the cheapest way to make a room look finished.
-
Breeding and stalls fifth — install functional blocks last, after the theme is locked in, so they land in the right spot.
-
Display last — showcase dragons and plushies go in after the room is photographed clean.
Players who skip straight to walls usually end up demolishing parts of the build later when a frame upgrade does not match the surface skins. For a deeper look at how the level gates feed into this build order, the lair level requirements walkthrough maps each upgrade to the room count it unlocks.
Tying Theme Choices to Late-Game Goals
The endgame lair is less about a single screenshot and more about a build that holds up across seasonal events. A coherent theme acts as a frame for the dragons you raise, the events you run, and the trades you broker, and the strongest late-game builds treat the lair as a single ecosystem.
Aligning Theme With Your Dragon Roster
Pairing wall and floor textures to each dragon's elemental palette is the real lever in lair theming — a Frost dragon's pale blue hide disappears against crystal tile but pops beside dark brick, while a Volcanic dragon's charcoal scales get lost on frosted panel. Because building materials are unlocked through progression tiers and event drops, planning a single roster's material budget upfront prevents the patchwork look of mismatched upgrades later, and it keeps your breeding area, hatchery, and main lair visually consistent as your collection grows.
-
Forest and Jungle dragons — mossy stone, plank, and vine trim. Greens and browns make the most of patterned hides.
-
Volcanic and Wasteland dragons — dark brick, volcanic rock, and ember trim. Deep reds and charcoals pop.
-
Tundra and Ice dragons — frosted panel, frosted tile, and pale stone. Cool palettes keep the room from feeling muddy.
-
Crystal and Aura dragons — crystal tile, marble, and rune inlay. Bright walls wash out, so a single accent wall is the safer call.
-
Event and Solstice dragons — themed accent walls per event, refreshed quarterly. A modular "event wall" saves rebuild time every season.
Sourcing a Theme-Friendly Roster
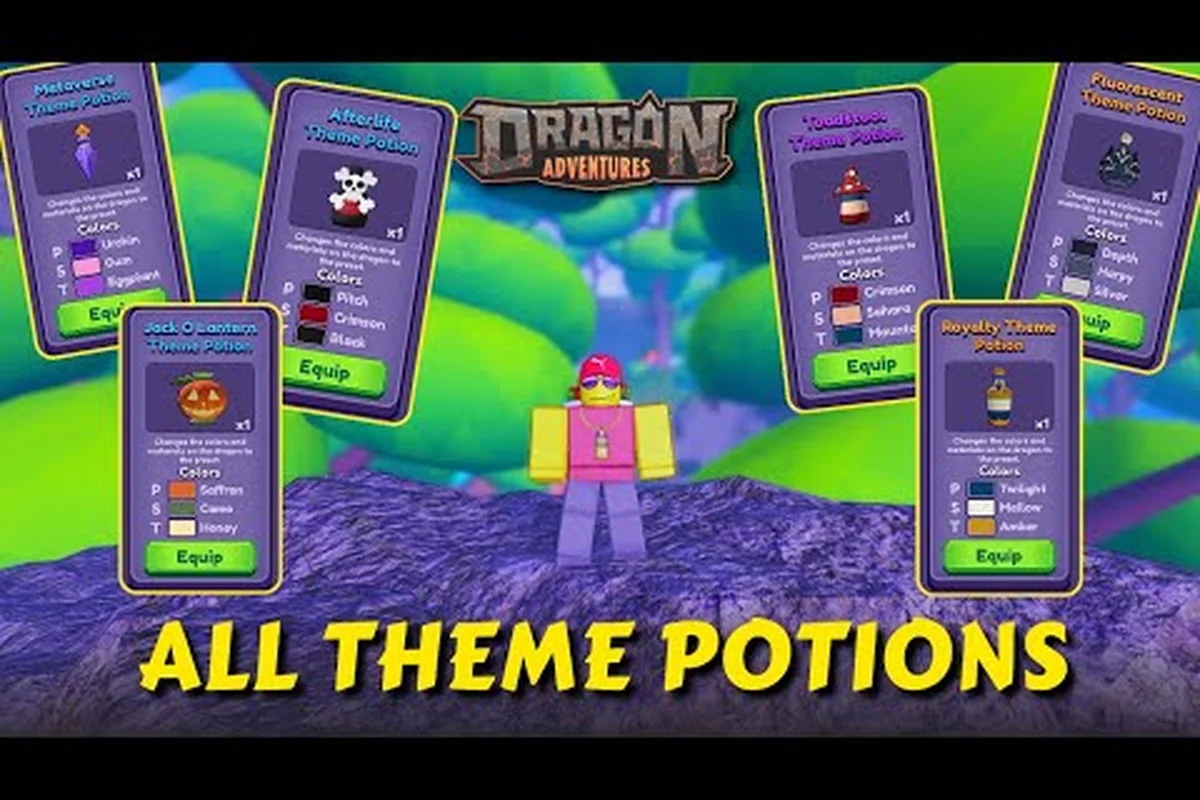
Most builders will not catch every dragon in their theme family, so a small trading pipeline matters. According to Game Rant, codes like JUSTYBLOX, AESUBREALM, FLUFFY, GALIFRAN, and SHAMEWING grant preset potions that can recolor or restyle dragons to fit a theme without forcing a roster overhaul. Pair codes with seasonal trades and your theme stays coherent even when the underlying dragons change.
For a more general primer on how breeding, feeding, and growth feed into a long-term progression plan, the beginner guide is a useful cross-reference, especially if you are building your first real theme.
Frequently Asked Questions
What is the cheapest coherent theme for a starter lair?
Plaster walls, plank floors, and one brick accent wall is the cheapest coherent starter theme because all three materials drop in starter biomes and do not require event tokens. According to community data, this setup costs roughly a third of a marble or crystal build and still photographs well once you add a single trim piece.
Where do I find marble and crystal wall skins?
Marble and crystal tile are most reliable from world chests in the late-game biomes, from Solstice and other event reward tracks, and from player trades. Frosted panel drops more often in Tundra biome chests, while crystal tile is more common in Ancient and Prehistoric biome chests based on community reports.
Can I change my lair theme without rebuilding the frame?
Yes, as long as you keep the same room count and footprint. Surface skins like walls and floors can be swapped per tile, and trim is a consumable cosmetic that you can replace cheaply. Frame changes — room shape, ceiling height, dividers — are the only part that requires demolition, so plan the frame once and skin it many times.
How big should the breeding area room be in a mid-game lair?
A medium breeding wing with two to three breeding slots is the sweet spot for a mid-game lair. It leaves enough space for a viewing platform on the long wall, which doubles as the accent wall in most theme families, and it keeps the breeding area adjacent to a nursery without crowding the stalls.
Do event skins come back every year?
Most event skins rotate back into the reward track on an annual or biannual schedule, but specific trims and accent walls have been re-released with new art in past years. Treat any limited trim as a long-term investment, and avoid over-relying on a single event skin for your whole theme because artwork can change between reruns.